×
- Hello
- Login or Register
- Quick Links
- Live Chat
- Track Order
- Parts Availability
- RMA
- Help Center
- Contact Us
- Shop for
- Mercedes-Benz Parts
My Garage
My Account
Cart
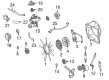
Genuine Mercedes-Benz C280 Cooling Fan Assembly
Engine Cooling Fan- Select Vehicle by Model
- Select Vehicle by VIN
Select Vehicle by Model
orMake
Model
Year
Select Vehicle by VIN
For the most accurate results, select vehicle by your VIN (Vehicle Identification Number).
5 Cooling Fan Assemblys found


Mercedes-Benz C280 Fan Blade
Part Number: 112-200-01-23$63.60 MSRP: $89.00You Save: $25.40 (29%)Ships in 1-2 Business Days
Mercedes-Benz C280 Fan Blade
Part Number: 103-200-04-23$86.40 MSRP: $120.00You Save: $33.60 (28%)Ships in 1-2 Business Days

Mercedes-Benz C280 Fan & Motor
Part Number: 001-500-12-93$205.20 MSRP: $286.00You Save: $80.80 (29%)Ships in 1-2 Business Days

Mercedes-Benz C280 Fan & Motor
Part Number: 203-500-16-93$402.00 MSRP: $560.00You Save: $158.00 (29%)Ships in 1-2 Business Days
Mercedes-Benz C280 Cooling Fan Assembly
Every part of the automobile matters, and their maintenance is crucial for the health of your vehicle. Moreover, a faulted Mercedes-Benz C280 Cooling Fan Assembly can impact its functionality as well as lead to system-wide problems that may endanger safety. Thus, it is imperative that one repairs or replaces failing parts for better driving experiences. Why go for OEM Mercedes-Benz C280 Cooling Fan Assemblies? Because they are the optimal solutions, fit your vehicle perfectly, and are easy to install. Therefore, these factors help maintain the dependability and performance of your vehicle. At MBPartsGiant.com, you may find all the required genuine parts for your Mercedes-Benz C280. They are delivered from authorized Mercedes-Benz dealers directly via an uncomplicated online catalog. We guarantee promptness, reliability, and cheap sales on the Mercedes-Benz C280 Cooling Fan Assembly, and we always provide you with the right part at any time. Depend on our genuine Mercedes-Benz C280 Cooling Fan Assemblies to keep your vehicle running smoothly.
Mercedes-Benz C280 Cooling Fan Assembly Parts and Q&A
- Q: How to check and replace the Cooling Fan Assembly and its components on Mercedes-Benz C280?A:Disconnect the cable from the negative terminal of the battery and rock the fan back and forth by hand to check for excessive bearing play. With the engine cold and not running, turn the fan blades by hand; the fan should turn freely. To replace the fan, disconnect the cable from the negative terminal of the battery, remove the air cleaner housing and air inlet duct(s), and on 4WD models, disconnect the power steering line bracket from the top rear of the radiator crossmember. Follow the fan wiring harness to the connector and unplug it, then remove the horn and detach the power steering oil cooler from the front of the radiator crossmember. Free the coolant line from the clip at the top rear of the radiator crossmember, and if the hood latch cable will block removal of the crossmember, disconnect it at the connector on the left side of the engine compartment. Detach the air guide clips and wiring harness ties from the crossmember at the upper front of the engine compartment, unbolt the bracket that secures the crossmember to the grille, and remove the retaining pin and mounting bolts from each end of the crossmember. Squeeze the radiator retaining clips to disengage them, then lift the crossmember off the vehicle, removing the clips that secure the air guide beneath it. Follow the fan wiring harness to the connector and unplug it, then free the clips that secure the fan shroud to the radiator and lift the shroud off, together with the fan motor, tilting the radiator forward for clearance as you lift the fan out. Carefully inspect the fan blades for any damage and replace if necessary, also checking the fan motor and electronic controller for signs of damage or roughness when rotating the assembly. At this point, the fan may be unbolted from the motor if necessary, and the motor and controller unbolted from the fan shroud. Installation is the reverse of removal, ensuring to tighten the fan and motor mounting bolts evenly and securely.

Related Mercedes-Benz C280 Parts
 Mercedes-Benz C280 Bulb Socket
 Mercedes-Benz C280 Differential Seal
 Mercedes-Benz C280 Fuel Filter
 Mercedes-Benz C280 Fuel Injector
 Mercedes-Benz C280 Starter Brush
 Mercedes-Benz C280 Thermostat
 Mercedes-Benz C280 Timing Chain Tensioner
 Mercedes-Benz C280 Water Pump
 Mercedes-Benz C280 Wiper Pulse Module